

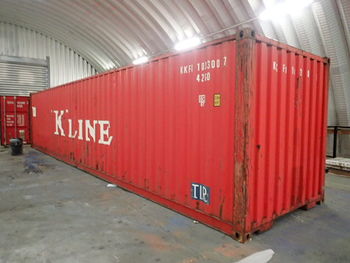
CD Code CS27969
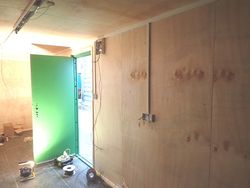
First we create the framework for the new door and cut an aperture into container. The frame is then welded into the aperture and a drip rail welded to the top, so the new door can be attached. This door was fitted to open inwards.
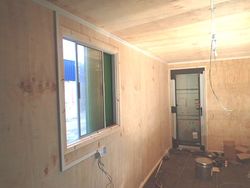
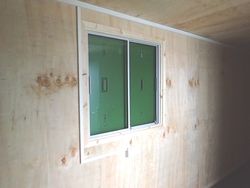
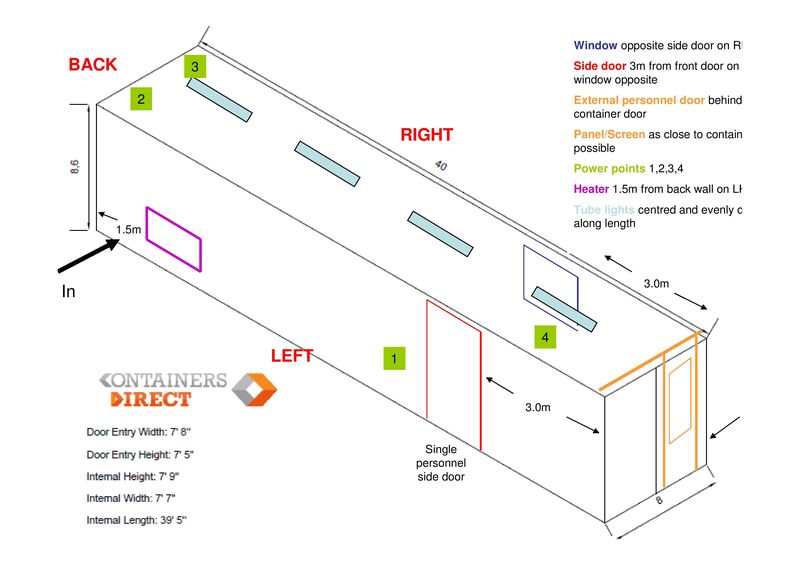
First we cut the required size apertures into the container and weld the frames to hold the glazing. The windows are then fitted with anti vandal steel shutters, offering a high level of security. This window is in the right hand side of the container, 3 ft 6in up from the floor.
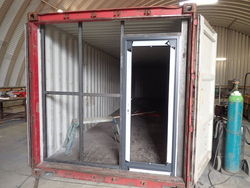
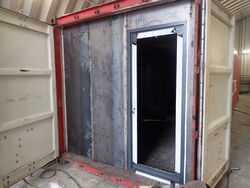
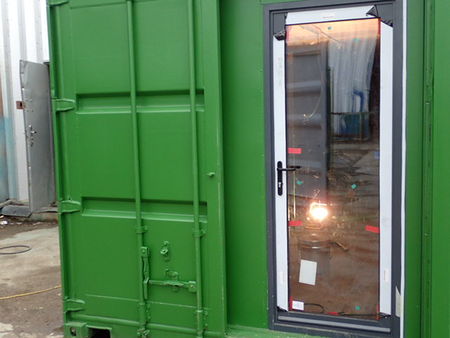
First a steel frame work is made using 50 by 50 box section. Then we weld this into the container, followed by 2mm thick steel sheets (cut to size on the guillotine), which fill the framework. On this job, the partition is 8ft wide and positioned directly behind the main container doors. In addition, the partition incorporates an aluminium door with a glass panel.
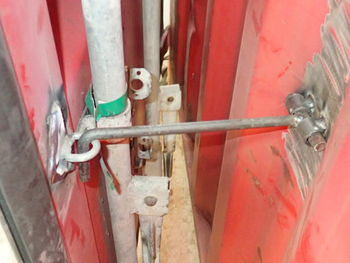
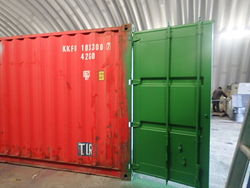
We fabricated a hook on the outside of the right hand door of the container, in order for it to be tied open when needed.
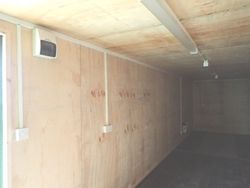
The container is insulated with 100mm rock wool, which is packed into a 12mm timber frame, fitted to the container walls. The edges are finished off with beading, to ensure no gaps are left. For this job, the doors were ply lined too.
For this job we fitted our Electrical Package B - which includes a consumer unit, external hook up, 4 strip lights, 4 double sockets and one wall heater.
Features
Design
Special Features
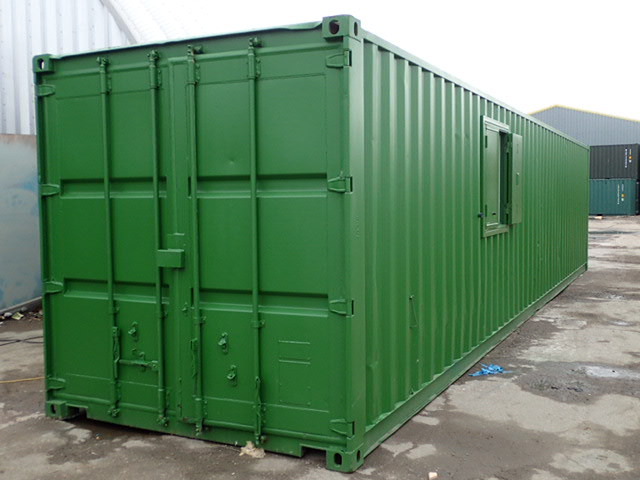
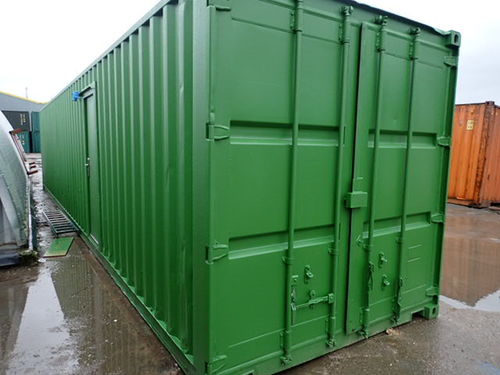
- 40ft shipping container
- Personnel door
- Window
- Steel partition with integral door
- Ply lined and insulated
- Electrics
- Tie open door hook
- Repainted green
- see our container office range - ModiBox®
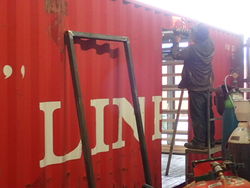
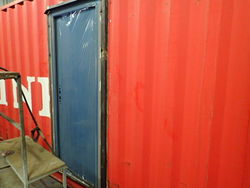
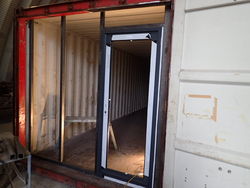
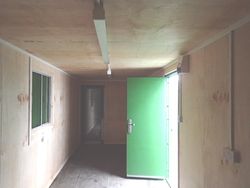
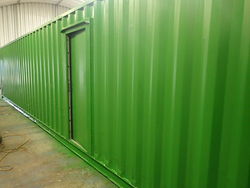
Step 1 - Fitting the personnel door
First we create the framework for the new door and cut an aperture into container. The frame is then welded into the aperture and a drip rail welded to the top, so the new door can be attached. This door was fitted to open inwards.
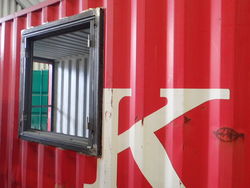
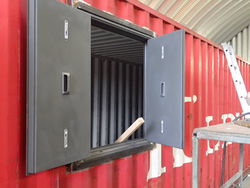
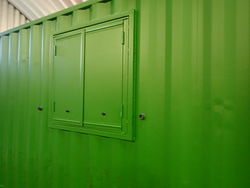
Step 2 - Fitting the window
First we cut the required size apertures into the container and weld the frames to hold the glazing. The windows are then fitted with anti vandal steel shutters, offering a high level of security. This window is in the right hand side of the container, 3 ft 6in up from the floor.


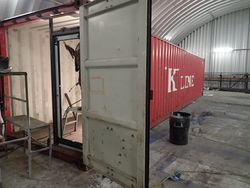
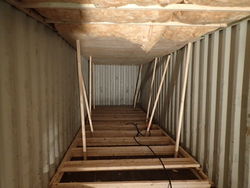
Step 3 - Making the steel partition
First a steel frame work is made using 50 by 50 box section. Then we weld this into the container, followed by 2mm thick steel sheets (cut to size on the guillotine), which fill the framework. On this job, the partition is 8ft wide and positioned directly behind the main container doors. In addition, the partition incorporates an aluminium door with a glass panel.
Step 4 - The door hook
We fabricated a hook on the outside of the right hand door of the container, in order for it to be tied open when needed.
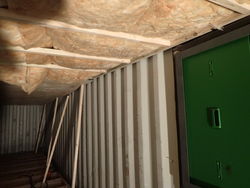
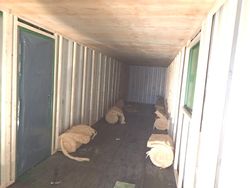
Step 5 - Ply lining
The container is insulated with 100mm rock wool, which is packed into a 12mm timber frame, fitted to the container walls. The edges are finished off with beading, to ensure no gaps are left. For this job, the doors were ply lined too.
Step 6 - Fitting the electrics
For this job we fitted our Electrical Package B - which includes a consumer unit, external hook up, 4 strip lights, 4 double sockets and one wall heater.
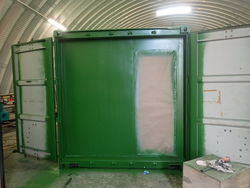
Step 7 - Repainting
The CAD
As with any product, specification is subject to change without prior notification. You are advised to confirm current specification before buying.